Location plan guide
Drawing a site boundary
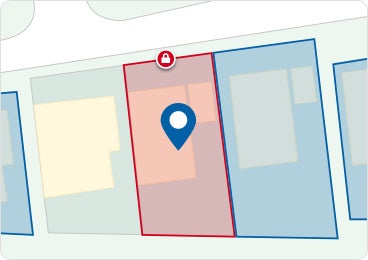
When you start using the site boundary tool, the site location that you entered at the start of the application, as a postcode or grid reference, will be shown on the map as a blue pin marker.
Red line boundary
The red line boundary is a shape that identifies the main site for your application. There will only be one red line boundary.
Your red line boundary should include the entire site, i.e., land required for access to the site, car parking, gardens, and other outbuildings around the site, such as garages.
For all applications, whether for residential, rural, or commercial developments, it is vital to show the site’s access to roads and potential joining of the public highway.

Blue line boundary
The blue line boundary should be used to highlight any other land owned by the applicant that is close to or adjoining the development site.
There can be none, one, or multiple blue line boundaries shown on a site location plan for one application.
Drawing your site boundary
You can draw the site boundary by using either the autofill or freehand drawing tools available.
Autofill drawing tool
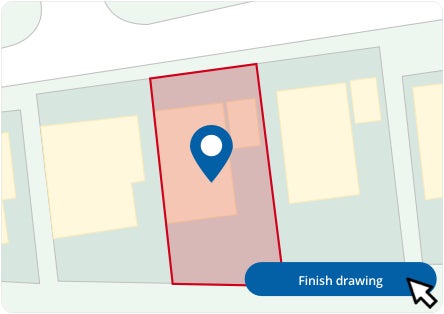
With the autofill tool selected, hover over the site area and the site boundary will be highlighted. Then click ‘Finish drawing’ to confirm the boundary that has been generated.
If you make a mistake, you can click ‘Reset boundaries’ to easily start your drawing again.
Make sure you click on the areas within the boundary shape to ensure they are also included.
Freehand drawing tool
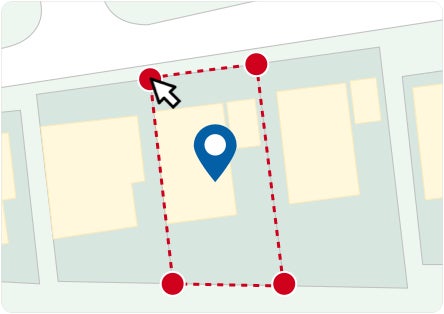
With the freehand tool selected, start drawing the site boundary by single-clicking on any corner of the site. Each click generates a corner point and joining boundary line. Take care not to duplicate your boundary lines.
Continually plot points in this way to draw your boundary shape, until you are happy it is accurate.
If you make a mistake, you can click ‘Reset boundaries’ to easily start your drawing again.
Make sure you click on the areas within the boundary shape to ensure they are also included.
More information
Read more about how to upload a site boundary and supporting information.
Next1
- https://www.planningportal.co.uk/services/help/location-plan-feature/uploading-a-site-boundary
- https://www.planningportal.co.uk/services/help/location-plan-feature/introduction
- https://www.planningportal.co.uk/services/help/faq/applications/site-boundary-and-location-plan
- https://www.planningportal.co.uk/services/terms-and-disclaimer